
Stripe
Instructions on how to setup Financial Connections for Instant Bank Verification
In this article
In this article, you will learn how to configure your stripe to allow your customers to instantly verify their bank accounts.

Why This is Important?
Steps to setup financial connections
In order for your customers to be able to instantly verify their bank accounts, you must first go through a simple business verification step in Stripe. If you don’t currently have Financial Connections available and verified, you will see a little message in business settings page like the one below.
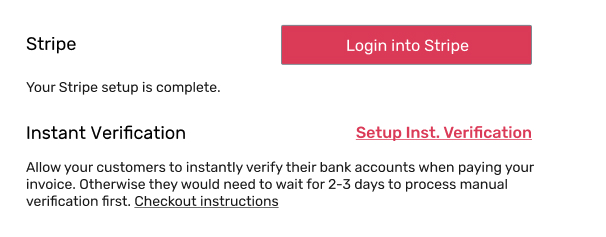
Once you click on “Setup Inst. Verification” button, you will be forwarded to Stripe to complete the verification process.
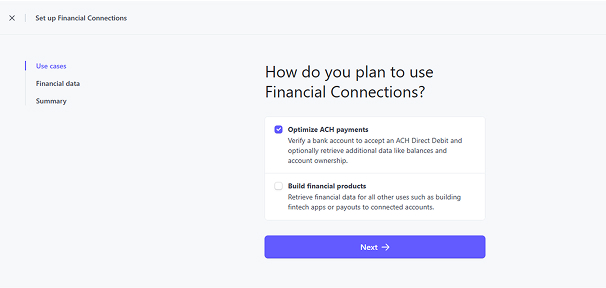
You may be required to login using your business email and password and then forwarded to the first step of the process. Select “Optimize ACH payments” option and click next ->.
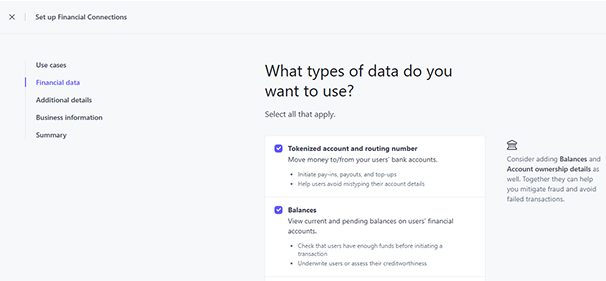
On the next step you need to select “Tokenized account and routing number” and “Balances” options and click next.
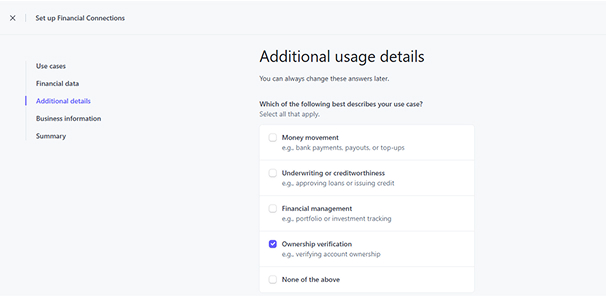
Next you will need to select “Ownership verification” checkbox.
Next Type into the “Tell us more about how you plan to use the data” textbox “Verify customers bank account ownership”

Next 4 options Choose:
- You agree that you will onlyu store this data in the US or UK => “Yes”
- Who are your users? => Select both checkboxes “Individuals” and “Businesses”
- Do you plan to share this data with third parties? => “No”

Enter your privacy policy, copy address below:
https://www.bizbaby.com/privacy-policy-page
Then click next

Check your business information and click next to see summary, once checked and everything looks good, click submit.
It may take a few days for verification to be approved. Once it is, your customers will be able to process verification for their bank accounts instantly.
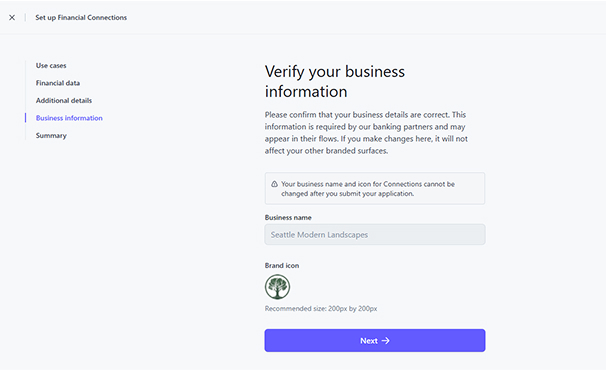
Editing Financial Connections
Was this article useful?
Knowing what to charge is step one
First 3 months free. No card required. Bring the whole team.
Start Free Trial Back to Login